
This is a new publication developed by the Little Conestoga Partnership, a similiar partnership to the Conewago Creek Initiative. It is an easy to use guide that walks a homeowner through the process of learning what stormwater is and the impacts it is having on their property. If you are simply looking for a way to help protect or improve your watershed or you are doing a small home improvement project that creates new impervious area and you need to manage the stormwater that is generated, then this guide is for you.
The full publication can be downloaded using this link: Homeowners Guide to Stormwater
To work through an online version of this guide, go to www.stormwaterguide.org

Below is a snap shot of the information included in the Homeowner’s Guide to Stormwater.
Assessing your property:
1. Find an aerial map of your property (Google maps is a useful tool). This map can either be printed or saved for step two.
2. Either by hand or using drawing tools on your computer, outline and label all of the different features on your property, including: roofs, driveways, walkways, patios, lawn, landscaped areas, and water features.
3. Approximate the size of each of these features in order to determine how many gallons of stormwater is generated by your property. 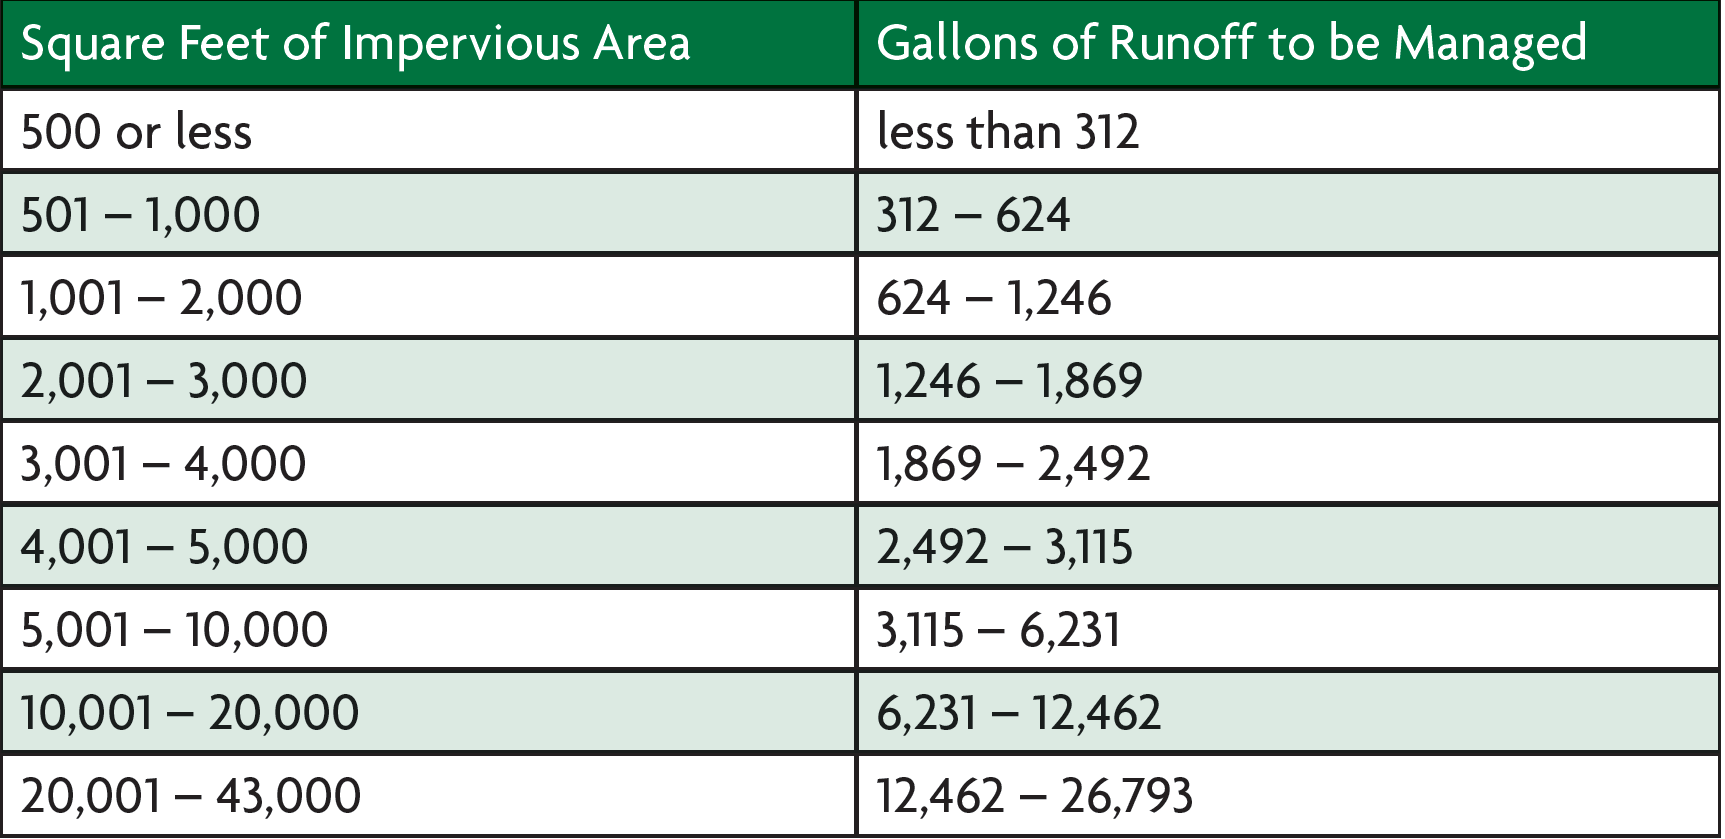 4. Locate all of your roof downspouts and determine which direction stormwater flows from them. Take note of any areas that are prone to flooding or standing water.
Types of Stormwater Best Management Practices:
Rain Barrel: a barrel that captures rainwater from a roof and stores it for later use.
Pros: minimal cost, conserves water to water plants or gardens, can be artistic/aesthetically appealing
Cons: must be emptied regularly (especially before freezing temperatures), captures a minimal amount of stormwater, can lead to mosquitos if not maintained properly
Things to consider: must be placed on a level surface, heavy when full For tips on installation, follow this link: Rain Water Harvesting Devices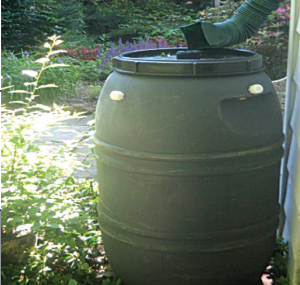 Rain Garden: a depressed garden that uses mulch, soil, and deep-rooted native plants to capture and infiltrate stormwater.
Pros: filters pollutants, provides wildlife habitat, requires little maintenance, aesthetically pleasing
Cons: plants take 2-3 years to establish (more maintenance required during that time period), can be costly
Things to consider: location very important- must be constructed downslope of runoff to be captured, at least 10 feet from building foundations, and not over wells or septic systems
For tips on design and installation, follow this link: Rain Gardens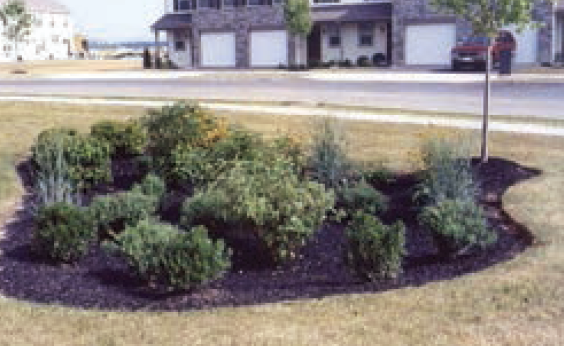 Native Meadow: an area planted with native grasses and wildflowers that is kept as a natural area. “No now” areas can also develop into meadows.
Pros: increases infiltration and evapotranspiration of stormwater, filters pollutants, requires little maintenance, provides wildlife habitat, aesthetically pleasing
Cons: site preparation (removal of turf grass), maintenance- mowing twice per year for the first two years and then annually after that, control invasive plant species
Things to consider: best on a 5% slope or less
For tips on choosing a location, installation, and maintenance, follow this link: Conservation Landscaping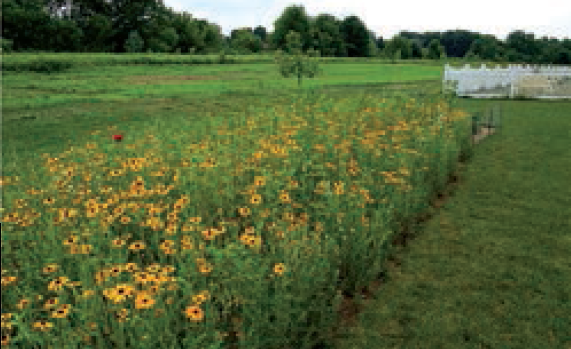 Tree planting/ Riparian Buffer: planting native trees and shrubs to restore a portion of your property to forested conditions (especially important alongside streams)
Pros: increases infiltration, filters pollutants, provides wildlife habitat, controls erosion, requires little maintenance, aesthetically pleasing, usually low cost depending on the species of tree planted
Cons: takes several years for trees to develop to maximize benefits, invasive plants must be controlled, trees must be defended against deer and vole damage in order to succeed
Things to consider: trees should be planted in the spring or fall at least 10 feet away from building foundations
For tips on tree planting and care, follow this link: Tree Planting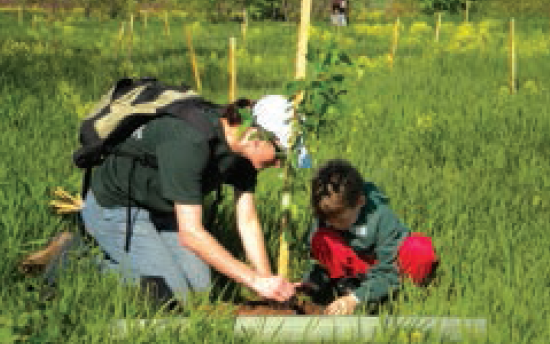 Pervious Pavers: impervious building materials, such as stone, concrete, or brick, laid with space in between to allow for pervious areas (gravel, sand, or vegetation) in driveways, parking areas, or walkways
Pros: increases infiltration, reduces volume and rate of runoff, can be artistic or have an aesthetically appealing design
Cons: labor intensive to install, more costly, must be maintained (look for signs of clogging, control vegetation between pavers)
Things to consider: need to install permeable sub-base, must be located 10 feet from building foundations 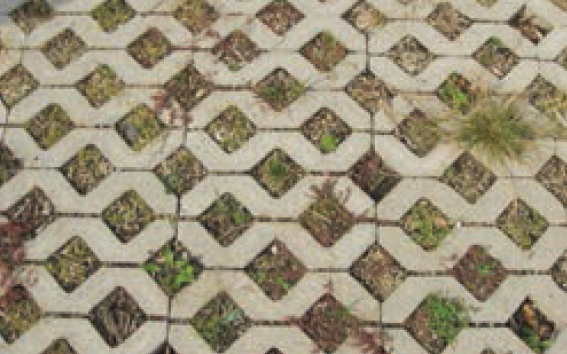 For a printable version of this page, download this PDF: Printable_Stormwater_Page
Watch the Extention at Home: Homeowner’s Guide to Stormwater Webinar